Image Link :https://top10sense.com/wp-content/uploads/2012/10/nice-heart-tutorial.jpg
hope you have saved your previous work in .psd file —–
if not you can refer to following tutorial
https://top10sense.com/2012/10/nice-heart-in-photoshop-wallpaper/
Now lets move further —
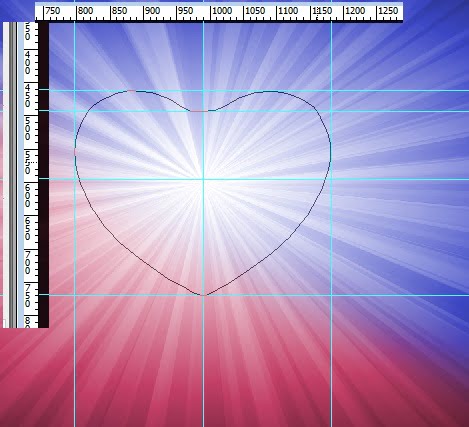
open the same document and make a new layer on top of rays layer and make a grid by clicking on ruler and dragging
the guide till the location shown below. Use pen tool to draw heart figure
( guides are used to snap figure better otherwise it will be little bit tough to apply symmetry ).
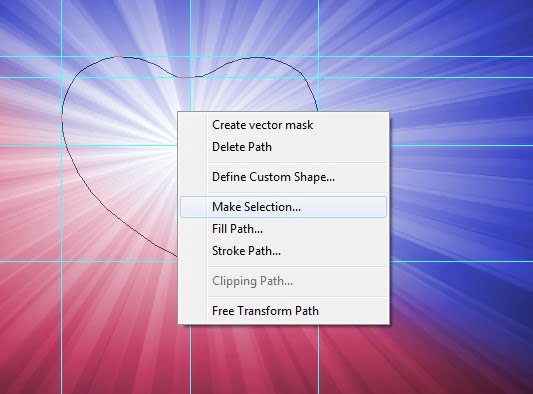
Now right click on the path you have made and select make selection rest of the setting default.
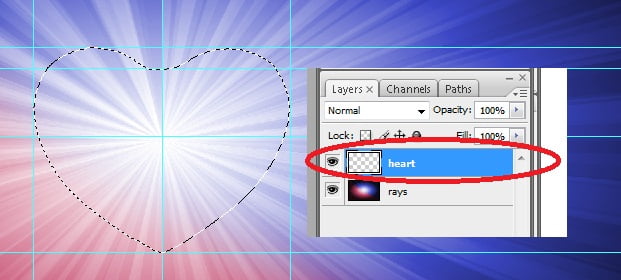
It will outline the path you have made with small lines moving at the edges. These are called ants because of their motion. Name this layer heart.
Now go to edit>fill select color from drop down ( you can use any color you can I have used #ed00b2 a variant of pink ).And press ctrl+D to deselect the layer.
Go to view>clear guides
It will look like this —

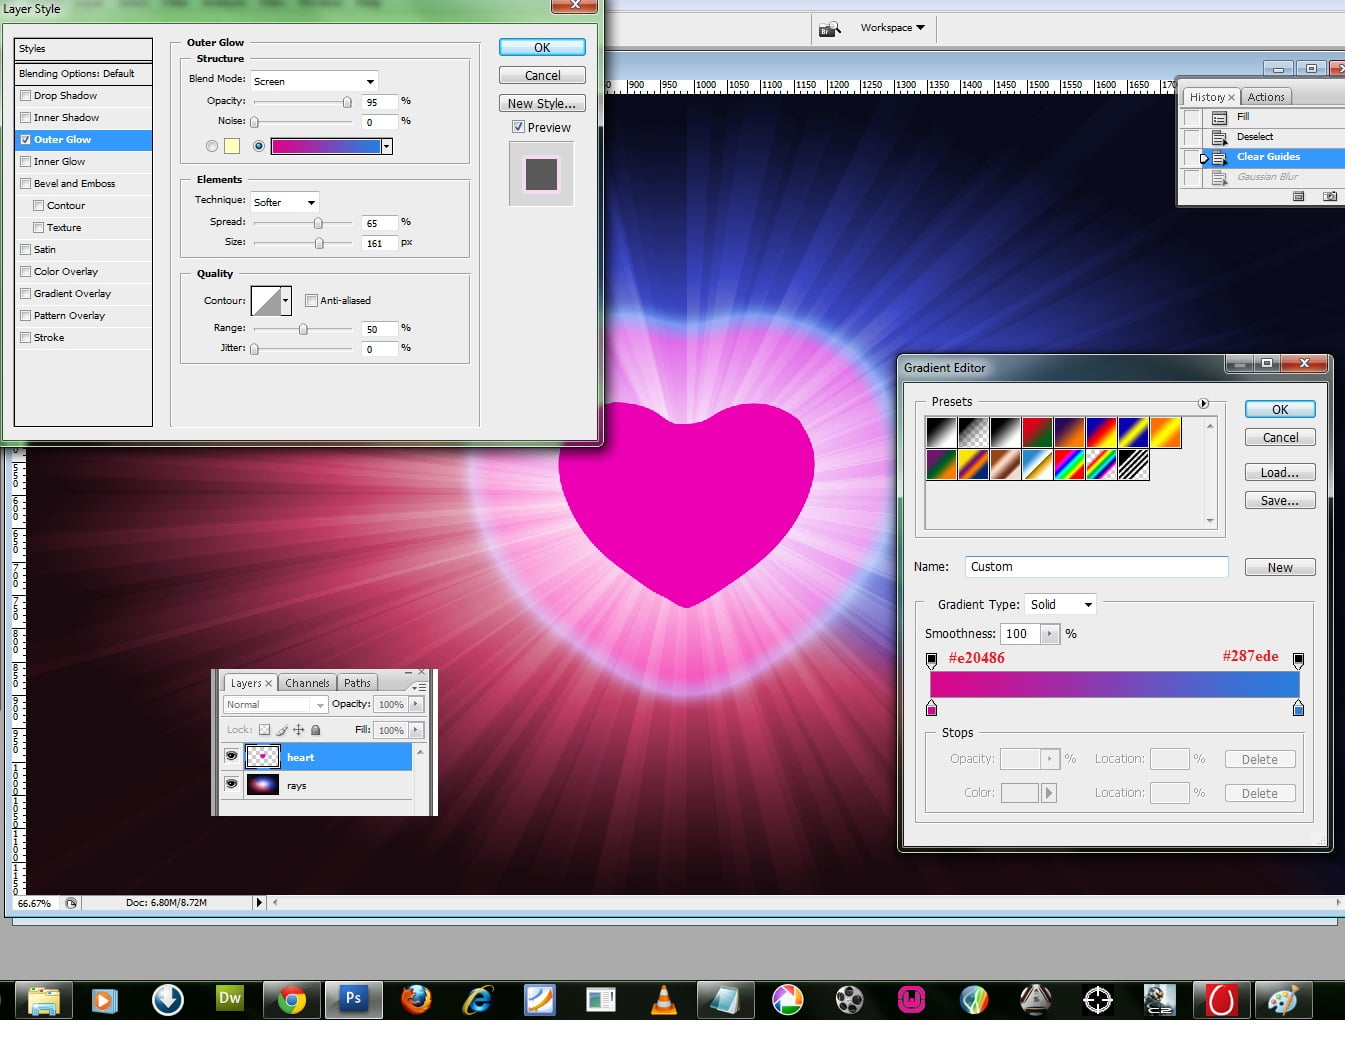
Now right click on heart layer select blending option. A dialogue will open select outer glow with following setting.
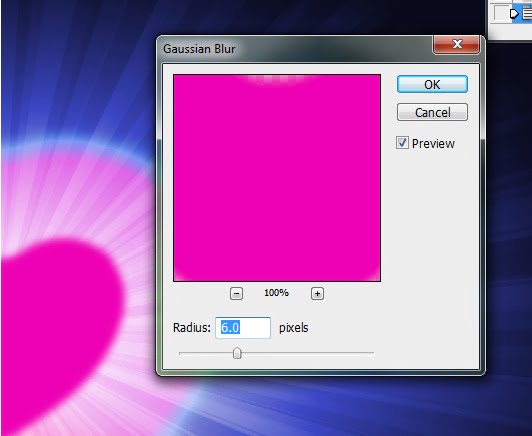
Now apply blur go to filter>blur>gaussian blur with following setting. ( Note you can always change your setting accordingly ).
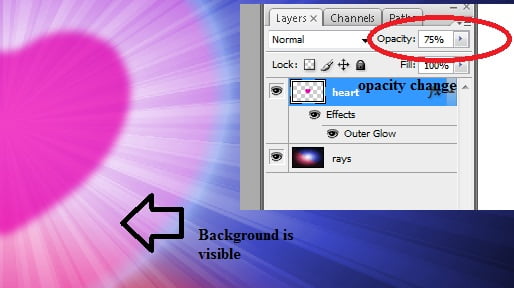
change opacity of heart layer as shown
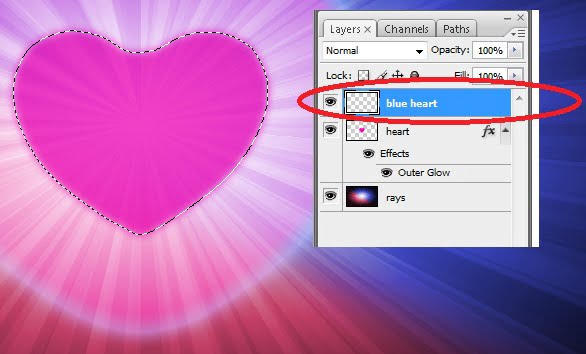
Now right click on the thumb nail of heart layer and choose select pixel and add a new layer.Name this layer blue heart.
Now go to select>modify>contrat and enter 30 their as shown
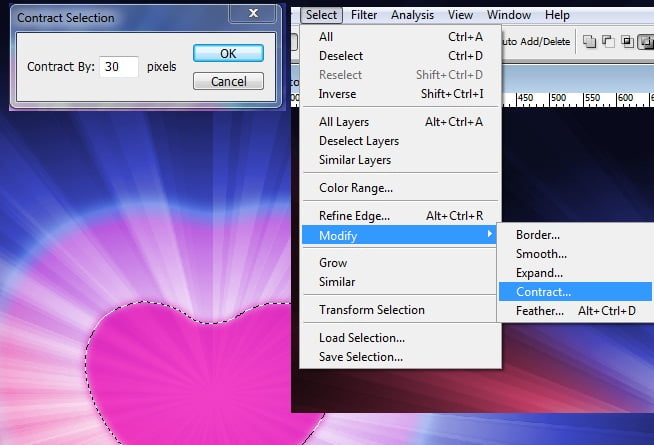
The heart is contracted by 30 pixel as shown below
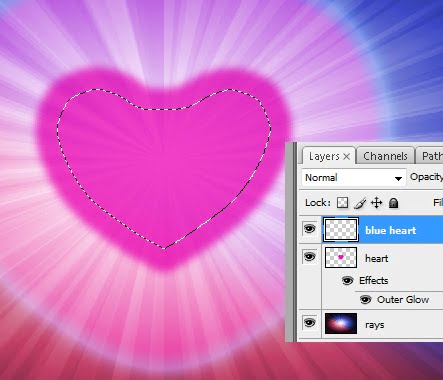
Now fill the heart with blue color
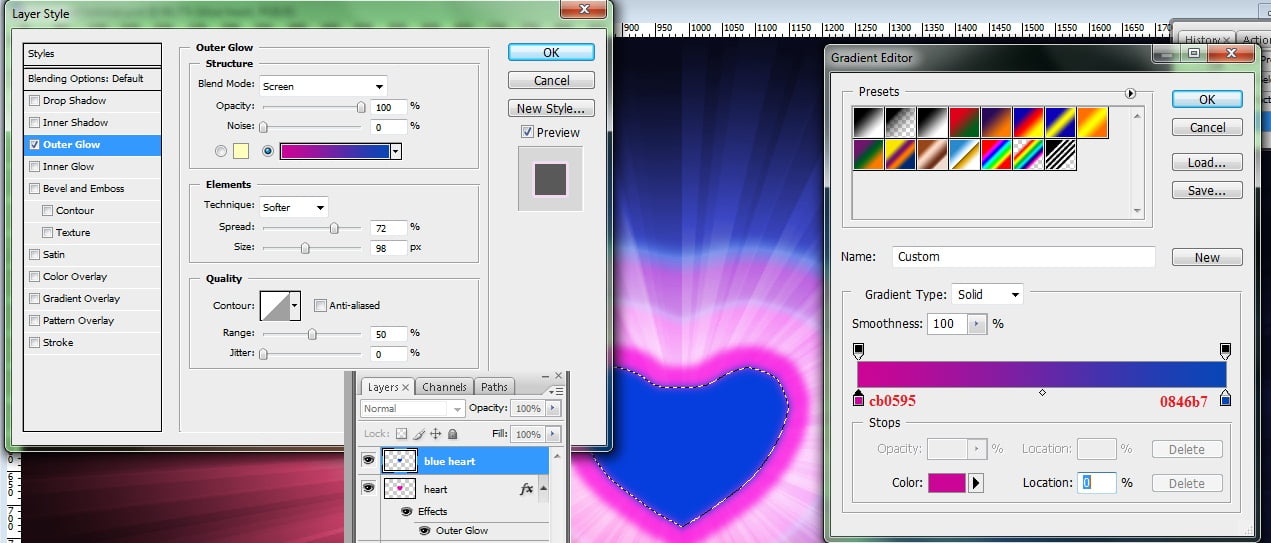
go to edit>fill select color from drop down and value #063edd
right click on blue heart layer select blending option with following setting
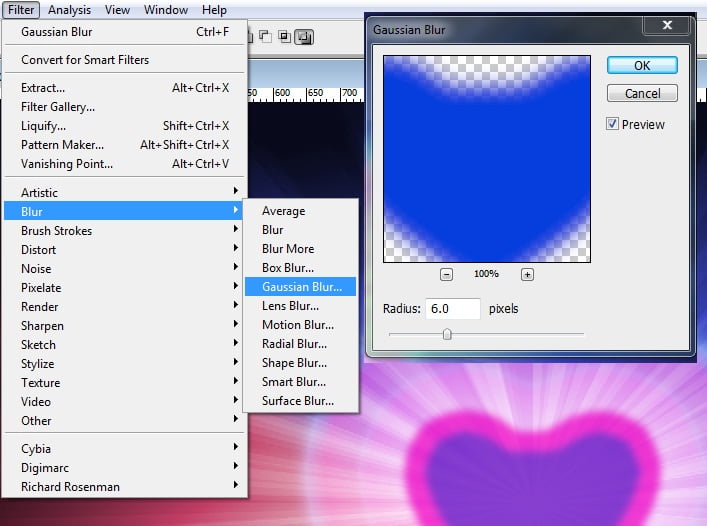
go to filter > blur > gaussian blur and value 6.0 as shown
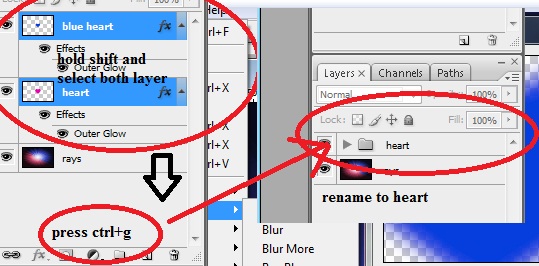
Now press and hold shift and select blue heart and heart layer and then press ctrl+g to group layers and name it to heart
Now click on the new layer icon to add a new layer above the heart group. go to edit>fill and fill it with black color. and name it frame. as shown below
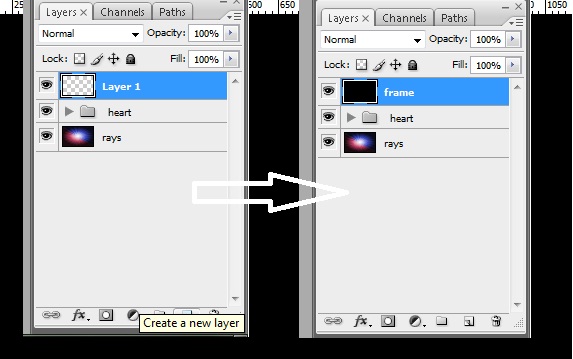
Don’t panic if only black color is visible to you.
Just use different eraser tool and erase part of it to get effect image below
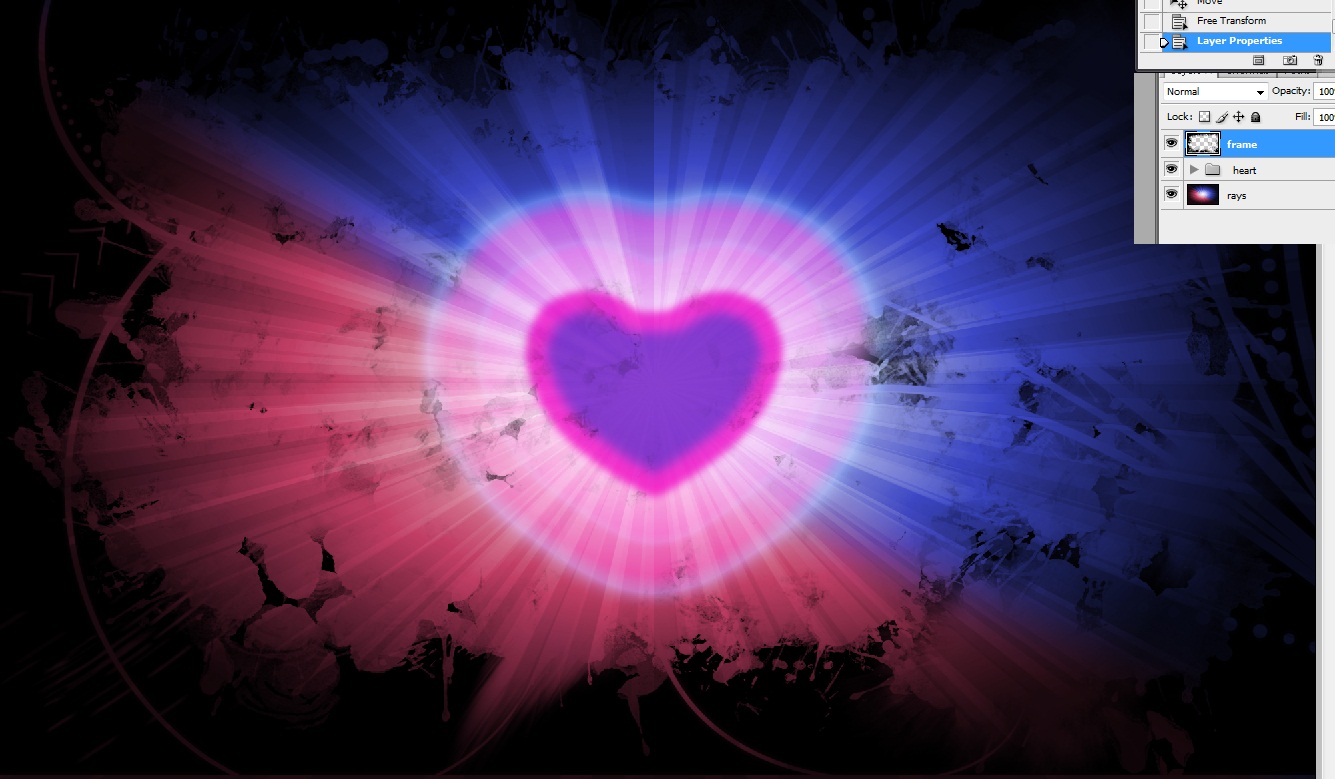
The image is almost complete.
Now add a new layer above heart group and name it black grass ( Note this layer must be below frame layer )
and select a Dun grass brush….. it is 112 pixel make to 70
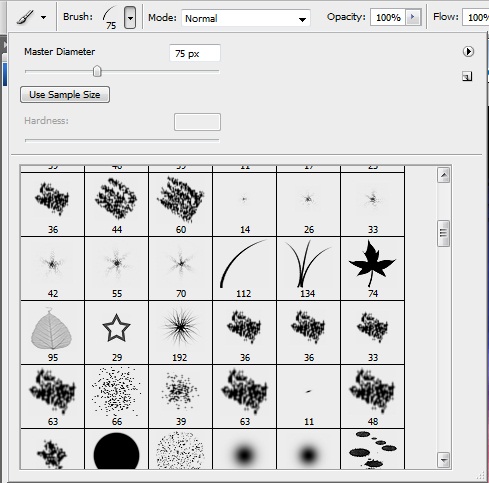
then click on the brushes button to change the following setting
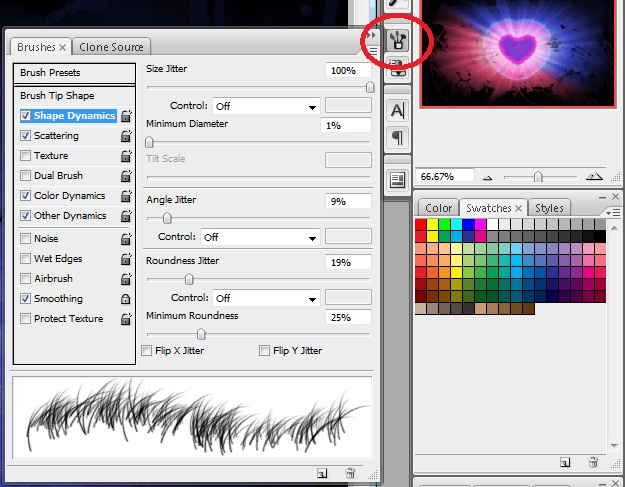
Now check scattering
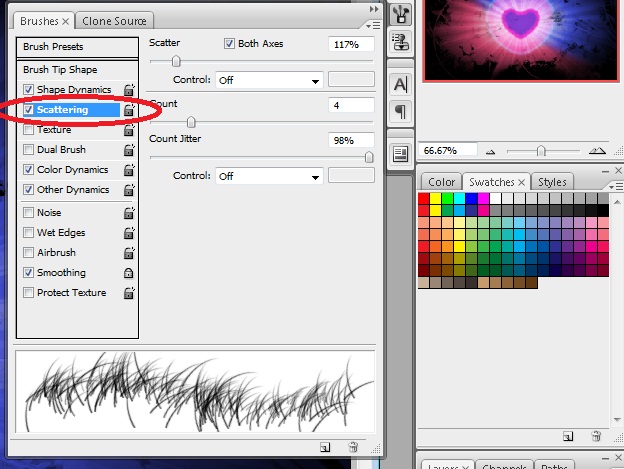
and rest of the setting default.
Now brush on this black grass layer to effect achieve similar to this one —
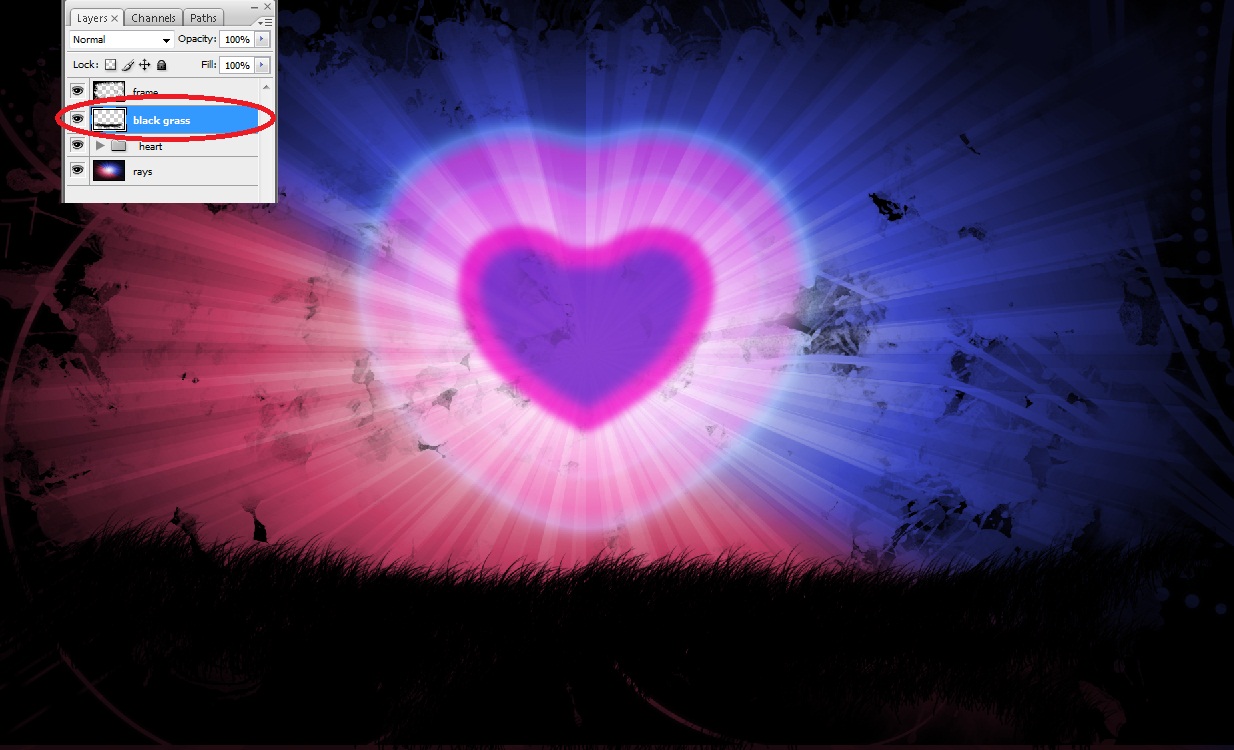
If grass is getting over heart you can move heart by select heart group bit up.
now download few images for couple like i did and open it in photoshop I have used three different images.

Now select pen tool by pressing p. And clip out the image as shown below.
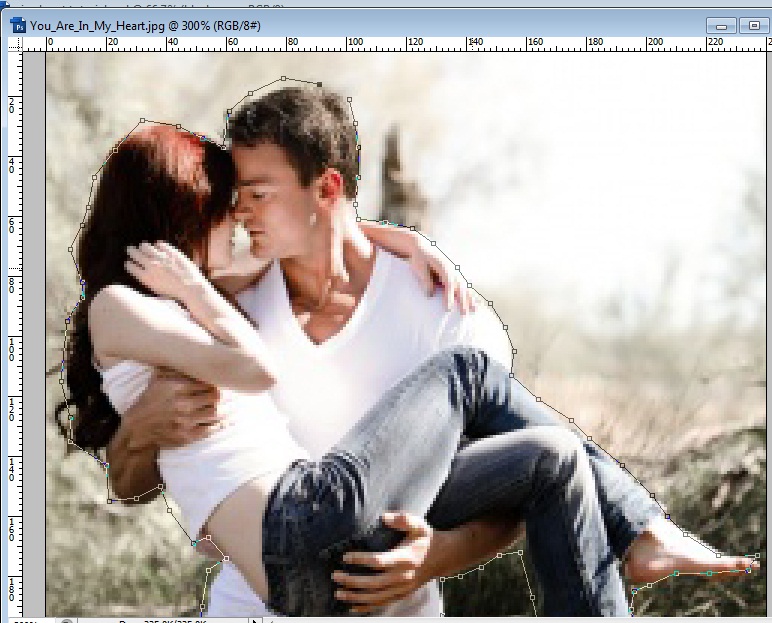
Now close the path by clicking on the first anchor and right click select make selection with default setting in the popup. Then press ctrl+shift+i to invert selection as shown.

Now right click on the layer ( background layer must be name ) select layer from background , select none from drop down and Press ctrl+x to cut pixel to get image like this —
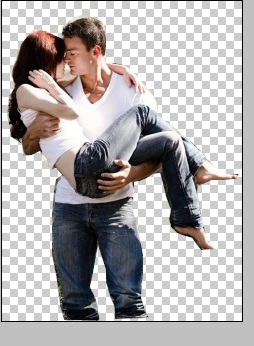
right click on the layer and select blending option
select color overlay and apply some gaussian blur ( filter>blur>gaussian blur to smooth egdes )
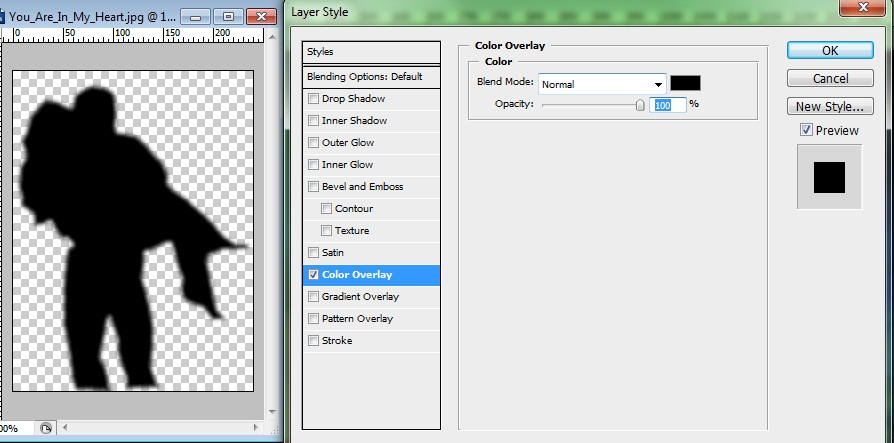
Do this to 3-4 more images and then drag them to your original document as i did..
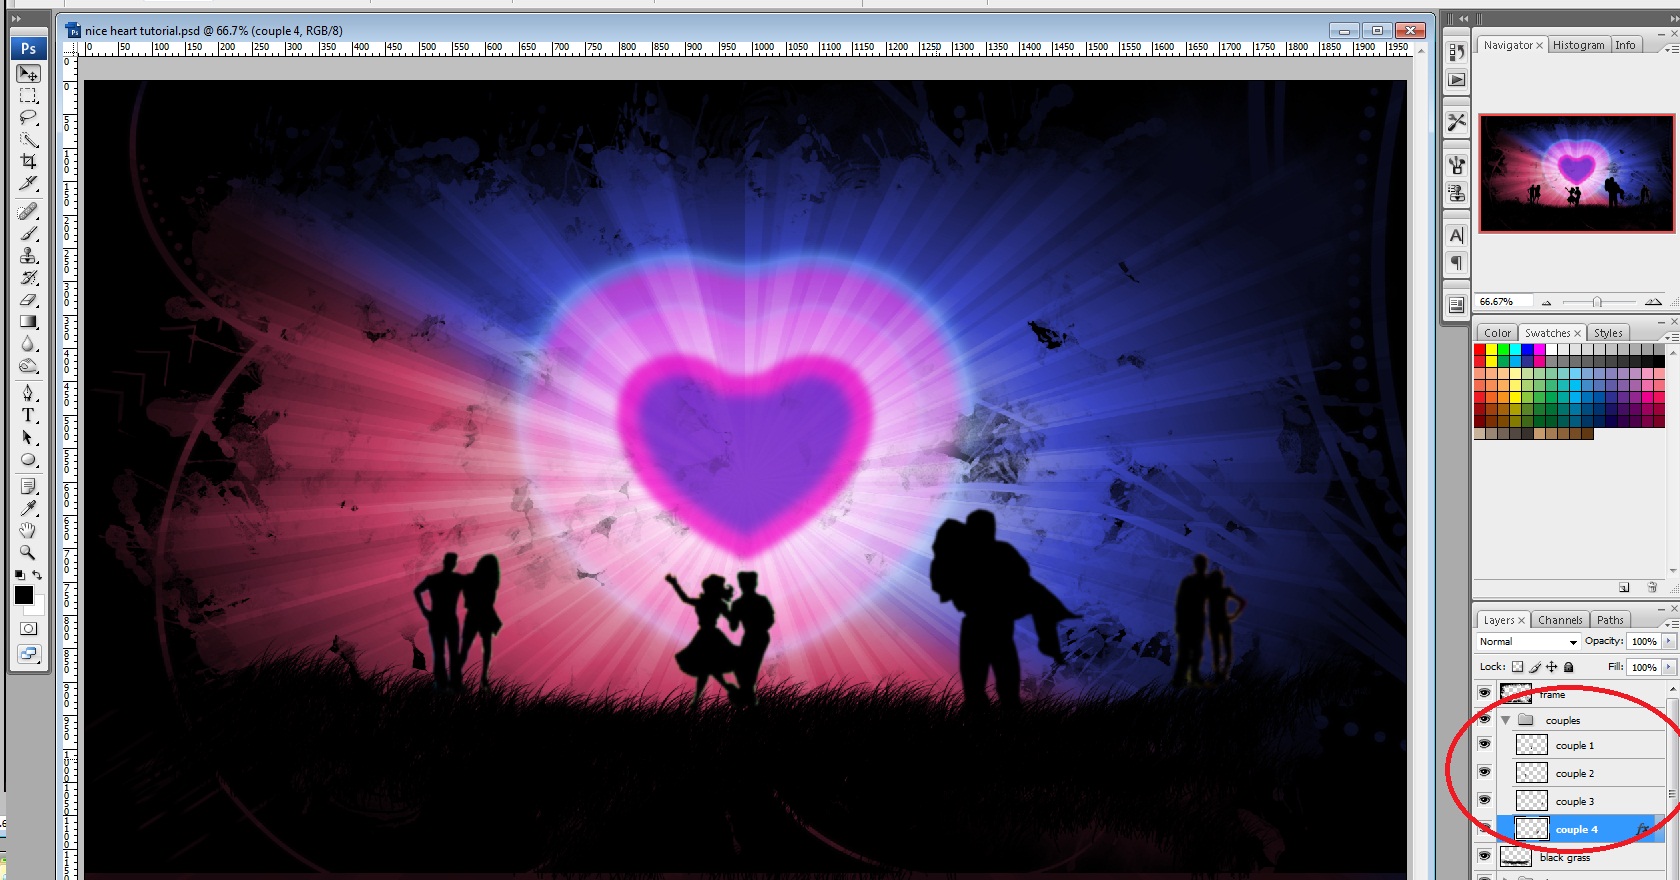
add as many as you can but don’t make it over and place all those in a group name couple by selecting all and pressing ctrl+g.
Here is what I achieve

Pingback: » Nice Heart – In photoshop Wallpaper | Woiba! » World Of Interesting Blogs & Articles
Pingback: Nice Heart - In photoshop Wallpaper - Top10Sense